Blueberry muffins and some creativity

16 Oct

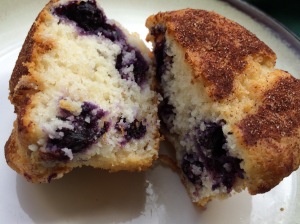
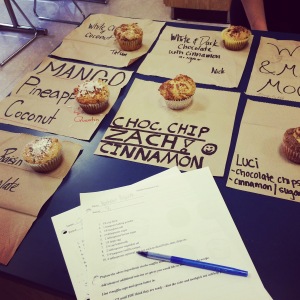
One of my all time favorite muffins is blueberry, where as most of the high school students prefer chocolate chip. Everyone worked together learning the muffin method by preparing a blueberry recipe which includes creamy yogurt and a cinnamon sugar topping. Then they branched out on their own to create personalized recipes by choosing from a variety of “mix- ins”, such as cranberry, strawberry, coconut, pineapple, mango, coconut and of course chocolate chip. As always, I am impressed with their creativity, although my vote still goes to the gooey, tart blueberry.

FullSizeRender

IMG_8629

Blueberry Muffins

Ingredients:

2 cups flour
1 tablespoon baking powder
½ teaspoon salt
1 cup sugar

1 1/2 cups plain yogurt
1 egg
¼ cup vegetable or canola oil

1 cup frozen blueberries

Topping:
1 tablespoons sugar
1 teaspoon cinnamon

1. Pre-heat oven to 350 degrees and line a 12-cup muffin tin with paper liners.
2. Mix the dry ingredients ( flour, baking powder, salt and sugar) together in a large bowl.
3. Whisk wet ingredients ( yogurt, egg and oil ) together in another bowl.
4. Measure cinnamon and sugar for topping in a small bowl.
5. Using a rubber spatula, empty the wet ingredients into the well of dry ingredients.
6. Mix gently with spatula, just until combined and all ingredients are moistened.
7. DO NOT OVERMIX! This forms gluten and makes it tough and chewy.
8. Gently stir in blueberries, over stirring will turn everything purple!
9. Scoop into muffin tins and sprinkle the tops evenly with cinnamon – sugar topping.
10. Bake ON THE TOP RACK for 25-35 minutes until a toothpick comes out clean from the center and tops are golden brown and crisp.

Whole Wheat Silver Dollar Pancakes

6 Oct

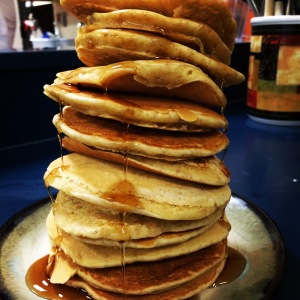
Thanks to period 1 for this delicious photo op!

IMG_8534

3/4 cups all purpose flour
1/4 cup whole wheat flour
1 tablespoon sugar
3/4 teaspoons baking powder
1/4 teaspoon salt

1 cup milk
1 large egg
1 tablespoon oil
1/2 teaspoon vanilla

Mix all dry ingredients together in a medium bowl and make a well in the center. In a separate bowl, beat eggs, milk, oil and vanilla until fluffy. Pour wet ingredients into the dry ingredient well and mix just until combined. Do not over-mix – some small lumps are okay.

Pre-heat a DRY (don’t grease it) non-stick pan for 2 minutes on medium heat. (When making pancakes for the first time and learning to adjust the heat, oil or butter to grease the pan can burn and smoke)
Pour about ¼ cup batter onto hot pan. You can fit 2 per pan. Do not make a giant pancake, it takes too long, the edges burn and center stays raw. Let pancakes cook until the edges start to dry out and a few bubbles form in the center. Use the corner of your spatula to lift the edges of the pancake and check underneath. They should be light, golden brown. If batter gets on the spatula, clean it off with hot water otherwise it will transfer the raw batter to the cooked side.

Flip each pancake ONE TIME! Don’t press down on pancakes after they’re flipped, this will make them dense and chewy. Remember, pancakes rise like any other cake – would you push down on a cake that just came out of the oven? It will take less time for the second side to cook, about 30 seconds to a minute.

Lower-Fat Brownie Cookies with Buttermilk

5 Oct

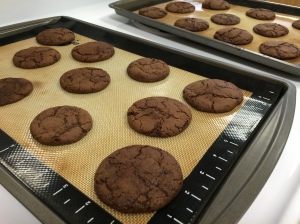
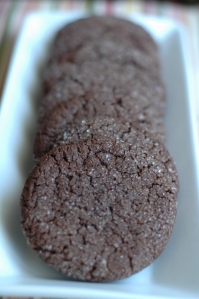
One of the first labs I work on with my high school students is a basic macaroni and cheese recipe. During evaluation, students find that each group has a slightly different color and consistency, but overall the finished products are pretty similar to each other. It is an easy and forgiving recipe which allows the students wiggle room for over measured cheese or under measured flour or milk. As with most recipes in the “cooking” category, you can be flexible and switching up some of the cheddar with American isn’t a big deal. On the other end of the spectrum, in the “baking category”, accuracy is essential. A little more baking soda, under measured flour or even the temperature of the ingredients can vary the finished product greatly. In our measurements lab this week, students prepared this Lower-fat Brownie Cookie recipe to practice accurately measuring ingredients using the correct tools. During evaluation, it was apparent in every one of the classes, that each group, even though they used the same recipe, had very different end results. Some changed shape very little, due to over measured flour or under measured liquid. Some had off flavors, revealing a mix up between baking soda and powder. Some spread very much and baked up like a lace cookie due to too much butter or buttermilk. But overall, most of them were delicious despite their differences and we all learned the importance of accurate measuring.

These cookies are 73 calories each and bake up just as the name suggests, a fantastic combination of brownie and cookie in one! Enjoy!

IMG_8494

(Original cookbook source is unknown)

Lower-fat Brownie Cookies  –

  • 1 cup all-purpose flour
  • 1/4  teaspoon baking soda
  • 1/4 cup butter
  • 2/3 cup granulated sugar
  • 1/3 cup cocoa powder
  • 1/4 cup packed brown sugar
  • 1/4 cup buttermilk (or add 1/2 teaspoon vinegar to whole milk to sour it)
  • 1 teaspoon vanilla
  • Nonstick cooking spray or nonstick baking mat
  • Powdered sugar for dusting

Directions

  1. In a small bowl stir together flour and baking soda and set aside.
  2. In a large saucepan, melt butter and remove from heat.
  1. Stir granulated sugar, cocoa powder and brown sugar into melted butter.
  2. Stir in buttermilk and vanilla until everything is combined and moistened.
  1. Stir in flour mixture until just combined, no flour should be visible.
  2. Let cool and roll into a log. Wrap tightly in plastic wrap and chill dough 1 hour or overnight.
  3. Pre heat oven to 350 degrees. Lightly coat cookie sheets with cooking spray or place on a nonstick baking mat. Roll into tablespoon sized balls. Set on cookie sheet 2 inches apart.
  4. Bake for 8-10 minutes until the edges are set, dough make still look wet. Cool on a wire rack for 5 minutes. Sprinkle with powdered sugar before serving.


Dutch Cocoa Cookies

25 Jan

004

026

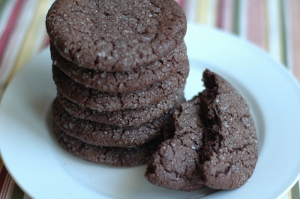
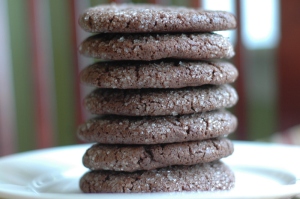
Sometimes a pair of shoes can really make or break your day. My shoes broke me today. Most of the time, when I come home exhausted, I can make something happen in the kitchen if I resist the urge to sit first. Stop at the store on the way home, walk in the door and get things cooking. DO NOT LOOK AT COUCH. I was fairly productive this week in the dinner department, even accomplishing some recipes I usually only tackle on weekends. But today all I really wanted was a slice of pizza and these cookies for dessert. The radio said its the coldest week in New York in 17 years, so getting out of the car and into the pizza place didn’t happen. And if it weren’t for the shoes I wore today, I would be making these cookies instead of just drooling over the pictures. If you were more sensible in your wardrobe choices today and you have some energy this Friday night, you should make these. They are the perfect combination of crunchy on the outside and chewy on the inside with just enough chocolate flavor to warm you up.

Dutch Cocoa Cookies
017
Adapted from Grammy’s Chocolate Cookies – MarthaStewart.com

  • 2 cups all-purpose flour
  • 3/4 cup Dutch cocoa powder
  • 1 teaspoon baking soda
  • 1/2 teaspoon salt
  • 1 1/4 cups butter, room temperature
  • 2 cups sugar
  • 2 large eggs
  • 2 teaspoons pure vanilla extract
  • coarse sugar for dipping

Directions

  1. Sift together flour, cocoa powder, baking soda, and salt. Set aside.
  2. In the bowl of an electric mixer fitted with the paddle attachment, beat butter,  sugar, and eggs on medium speed until light and fluffy, about 2 minutes. Add vanilla, and mix to combine. Gradually add dry ingredients, and combine with mixer on low speed. Cover bowl with plastic wrap, and chill until dough is firm, about 1 hour.
  3. Preheat the oven to 350 degrees. Line baking sheets with parchment paper or grease lightly. Roll dough into 2 inch balls. Dip top of each ball into coarse sugar. Place on prepared baking sheets about 2 inches apart. Bake until set on edges, about 8 -10 minutes. Cool on baking sheets for 5 minutes before transferring to a wire rack to cool completely.

Creamy Cauliflower Soup with Cheddar

12 Jan

saute - siclian greens 010

  • 2 tablespoons  butter
  • 2 tablespoons olive oil
  • 1 large  onion,diced
  • 2 tablespoons flour
  • 3 cups  chicken broth
  • 1 large head cauliflower – golden color cauliflower if possible, cut into small florets
  • 1 teaspoon salt
  • 1/4 teaspoon cayenne pepper
  • 3 teaspoons dry mustard
  • 1/2 cup  sherry
  • 1 1/2 cup milk
  • 1 cup extra sharp cheddar cheese, shredded
  • Croutons and minced parsley for garnish

In a heavy bottom put, cook the onion in the butter and olive oil until it’s softened. Stir in the flour and cook 1 minute. Add in the broth, about 3/4 of the cauliflower, salt, cayenne and mustard.

Let the soup simmer for 15 -20 minutes, until the cauliflower is very soft.

Puree the mixture using a hand immersion blender.

Add in remaining small florets and cook until tender.

Stir in the milk, cheese and sherry. Bring the soup to a simmer, do not boil.

Taste for seasoning and readjust with cayenne and salt. Serve with croutons and minced parsley.

Popovers

8 Sep

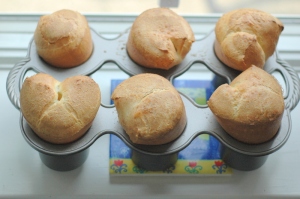
Wet batter gets poured into a deep cup.

A super hot oven sets the rising crust.

Steam trapped inside creates a big empty pocket.

A crispy vessel is ready to be filled with goodness.

Waiting 40 minutes for these to bake is the only difficult part of this recipe…


Basic Popovers – from Food Network

Ingredients

  • 1 tablespoon unsalted butter, melted and cooled, plus 1 teaspoon room temperature for pan
  • 4 3/4 ounces all purpose flour, approximately 1 cup
  • 1 1/2 teaspoons kosher salt
  • 2 large eggs, room temperature
  • 1 cup whole milk, room temperature

Directions

Preheat oven to 400 degrees F.

Grease a 6-cup popover pan with the 1 teaspoon of butter.

Place all of the ingredients into a food processor or blender and process for 30 seconds. Divide the batter evenly between the cups of the popover pan, each should be about 1/3 to 1/2 full. Bake on the middle rack of the oven for 40 minutes. Remove the popovers to a cooling rack and pierce each in the top with a knife to allow steam to escape. Serve warm with fruit preserves.

Summer Corn Salad with Tomatoes and Basil

5 Sep


I found this recipe in Bon Appetit magazine in June and immediately knew I would be making it with my summer cooking class students. Since we were in a classroom and not outside, we skipped the original instruction to char the corn on a charcoal grill and gave the corn a quick saute in a cast iron pan instead. This took a long time and since there was such a large amount of corn, it didn’t really brown unless cooked in very small batches. This recipe doesn’t feature anything revolutionary or complex, but we all loved it, many of us eating it by the spoonfuls. It’s just simple summer flavors coming together to create something refreshing, tart and sweet. I loved it so much I made it from every batch of farmers market corn I bought, but as summer laziness kicked in, I began slacking on the recipe steps. I began leaving out the thyme, which I didn’t grow in my garden this year, and just microwaved the corn in the husk for 5 minutes before shucking it. That was all the cooking it really needed, although it was equally delicious completely raw on days where there wasn’t even time for that. The key to this recipe for me is the lime rather than lemon, it makes for an interesting pairing with the basil. I know that I am posting this a day after labor day, the unofficial end to summer, but technically the summer solstice isn’t over until Sept 21st. As long as my garden keeps pumping out September tomatoes and basil and the farmer’s market continues to give me corn, this recipe will continue another month longer.

Summer Corn Salad with Tomatoes and Basil – barely adapted from Bon Appétit’s Charred Corn Salad| July 2012

  • 6 ears of corn
  • 4 tablespoons olive oil
  • 1/2 cup finely diced red onion
  • 1 large tomato, chopped
  • 1/2 cup  fresh basil leaves, ripped into small pieces
  • 2-3 limes, juiced
  • 1 tablespoon chopped fresh thyme – optional
  • Kosher salt, freshly ground pepper

Microwave corn in the husk for 5 minutes and let cool. Remove husks and  silk and shuck corn from the cob. Place onion in a strainer and rinse with cold water to reduce it’s pungency; drain. Mix onions, oil, tomatoes, basil, lime juice, and thyme together with corn in a bowl. Season to taste with salt, pepper, and more lime juice, if desired. Serve room temperature.

2 Jul

Lessons in Food


As I sit down to write these recipes tonight, I’m absorbing all the smells, sounds and sights of this time of year. I can hear and feel a slight rumble of pre-4th of July fireworks in the background, followed by car alarms. Fireflies flicker outside my window and I can see the neighbors kids playing man hunt on the lawn. My skin still has the sweet smell of suntan lotion and sand and as I climbed the stairs to the second floor, I can’t help notice that even in this new house, the upstairs “summer smell” is the same as my childhood home. It’s a smell that flashes me back to summer sleepovers, when my cousins and I ran up the stairs to grab sheets and pillows to bring downstairs to build forts in the air conditioned living room. Then there is taste. What does summer taste like? Salty beach lips… grilled corn in your teeth… burnt marshmallows… ice cream and the…

View original post 446 more words

Lemonade and a Kitchen-Aid Stand Mixer Review

25 Jun

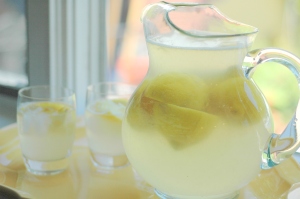
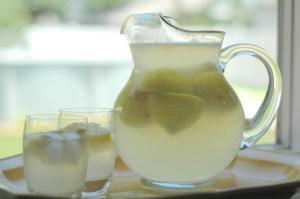
With all the many things you can do with a Kitchen-Aid stand mixer, choosing a recipe as simple as lemonade to show off its capabilities may seem like an odd choice.  My Kitchen-Aid and all its attachments get used for pasta making, meat grinding, dough kneading and cake mixing all the time. Since these items are not necessarily the types of things most busy cooks do everyday, some people have a hard time justifying buying a Kitchen-Aid mixer for themselves. The thing is, when you do purchase one, it makes such an easy job of everything that you will start making more complicated items without hesitation. What used to be special occasion becomes simple everyday stuff. My students were lucky enough to have them this year for the first time and it has completely transformed the curriculum because of the things it can do and also the time it allows us to do things in. The important thing is keeping it out on your counter in an accessible spot so you will be able to use it for all types of tasks. Which brings me to today’s simple task, lemonade. Lemonade is as simple as hand squeezing lemons and whisking in sugar, right? Seems like it, but just like a ridiculous infomercial can prove, something as simple as lemonade can turn out to be a time-consuming sticky mess. If your Kitchen-Aid is out and ready to go, it’s as easy as screwing on the juicer attachment and juicing straight into the mixing bowl for easy and efficient whisking in of the sugar.  I’m not suggesting anyone purchase a Kitchen-Aid mixer just to make lemonade, if that were the only thing you were to use it for, it would be a sin. Once this kitchen must have item is in your possession you’ll find whipping up a batch of cookies on a Tuesday night is no big deal. Homemade fettuccine doesn’t need to be an all day Sunday affair and can be completed in less than a half hour. Pizza and bread dough will become a weekly occurrence . It can also save you some time mixing up something as simple as a quick summer drink.

Kitchen-Aid Lemonade

Mixing the sugar into the lemon juice with the whisk attachment eliminates the need for boiling sugar and water together to make a simple syrup on the stove top.

  • 1 cup sugar
  • 1 cup lemon juice – about 10 large lemons
  • 5 -7 cups water

 Attach the juicer to the Kitchen-Aid stand mixer and place the mixing bowl underneath the juicer’s spout.  Turn the mixer on medium speed and extract the juice from the lemons into the bowl.

Detach the juicer and place the mixing bowl back into the base. Attach the whisk and begin beating on low-speed. Slowly add in the sugar. Raise the speed and add in 5 cups of water. Whisk for 3 minutes. Taste, and add water if too sweet or tart.

Pour lemonade into a pitcher and add the juiced lemon shells. Serve with ice and lemon wedges.

Sam’s Amazing Salmon

16 May

People always ask me what my favorite meals are and where I like to eat. Although there are a few places I like to go out to, most of my favorite dishes are ones made by friends and family. One of the most memorable things I have had in a long time is this recipe from my Aunt’s friend Sam, that he brought to her 4th of July party. Like an episode of the Food Network’s “The best thing I ever ate”, I couldn’t stop talking and thinking about this salmon for weeks after I had it. It was a beautiful whole salmon, steamed over a flavorful liquid and accompanied by a fresh, bright mango salsa. It was plated with a trio of different dipping sauce options and served cool. I ate my weight in salmon that day and even at night, when everyone else had switched to dessert before the fireworks, I was stealing more from the fridge instead of ice cream.

Although I was able to get the recipe from Sam awhile ago, life has been busy and I have yet to share it with you. I decided to share it with you tonight, because unfortunately, I found out that Sam has been sick in the hospital and needs to have surgery tomorrow. I hope you enjoy this recipe as much as I do, and that you say a prayer that he has a quick recovery and can share more great recipes with us as soon as possible.

Salmon and Mango Salsa – served with Dill, Chipotle Pepper and Honey Mustard dipping sauces

In Sam’s Words exactly:

Select a salmon fillet to suit your taste and of a size to fit your need. If you don’t have a poaching pan ( an asparagus cooker works very well too), you can use a deep frying pan as long as you use a wire rack so the salmon does not rest in the liquid. In the bottom of the pan, place a mix of 1 cup of water to 2 cups of white wine. I prefer Sauvignon Blanc or a similar white wine of full body and taste.

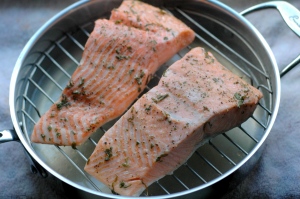
Rub the salmon with salt, white pepper and bit of finely minced tarragon and place on a rack in the pan so the salmon is not resting in the liquid. Over medium heat, cover the pan and steam/poach the salmon fillet.
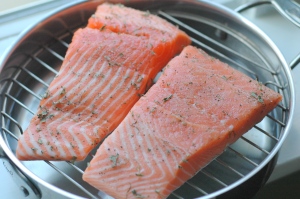
Once the liquid begins to boil, continue cooking for about 10 minutes, depending on the size and thickness. When cooked through, turn off the heat and allow to cool to room temperature with the cover on. Place in the refrigerator for 3 hours or up to a day to cool completely.
Remove from rack and surround it with mango salsa.

Mango Salsa

2-3 ripe mangoes, diced small

1/2 red onion, finely diced

2-3 tablespoons cilantro, finely chopped

the juice of 2-3 limes, freshly squeezed

2 tablespoons orange juice, freshly squeezed

freshly ground salt and pepper to taste

Combine all ingredients in a bowl and mix. Season with salt and pepper. Allow to stand at least one hour or up to a day to allow the flavors to blend.

Note- this also works out very well with using ripe papaya, pineapple or guava.

Dill Sauce

In a bowl, combine 6 oz sour cream with 1 tablespoon of mayonnaise. Finely chop a handful of fresh dill and add to sour cream.  Mix in 1 teaspoon Dijon mustard. Mix by hand rather than in a food processor otherwise it becomes runny. Refrigerate at least 2 hours.

Chipotle Sauce

In a bowl, combine 6 oz sour cream with 1 tablespoon of mayonnaise. In a food processor finely chop a chipotle pepper ( canned in adobo sauce ) with 2-3 tablespoons of the sauce from the can. Add to sour cream mixture. Refrigerate at least 2 hours.

Honey mustard sauce

In a bowl, combine 6 oz sour cream with 1 tablespoon of mayonnaise. Add 5-6 tablespoons Dijon mustard ( smooth, not with mustard seeds) and 3-4 tablespoons honey. Mix in 4 tablespoons freshly squeeze lime juice. Refrigerate at least 2 hours.

Thank you Sam and get better soon!